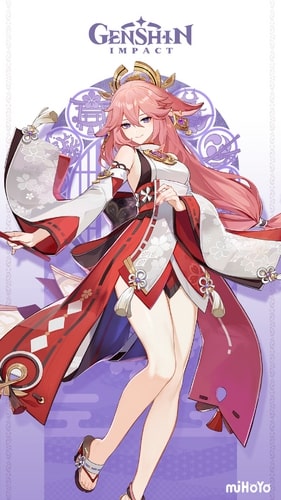
Yae Miko Guide
“My favorite pastime is reading other people’s stories.”
GRADE: 5-STAR
VISION: Electro
WEAPON: Catalyst
HOW TO GET: 50/50 Character Event Banner
GOOD FOR: Spiral Abyss, Artifact Farming, Weekly & Normal Bosses, Speed Clears
YAE MIKO MAX STATS
(LvL 90 / Ascension Phase 6)
HP: 10,372 ATK: 340 DEF: 569 BONUS: CR +19.2%
YAE MIKO VIDEO GUIDE
YAE MIKO LEVEL ASCENSION MATERIALS
SWIPE TO CONTINUE VIEWING ->
| Material | Lvl 20 | Lvl 40 | Lvl 50 | Lvl 60 | Lvl 70 | Lvl 80 |
|---|---|---|---|---|---|---|
 Vajrada Amethyst Sliver (1) Vajrada Amethyst Sliver (1) | 1 | 0 | 0 | 0 | 0 | 0 |
 Vajrada Amethyst Fragment (9) Vajrada Amethyst Fragment (9) | 0 | 3 | 6 | 0 | 0 | 0 |
 Vajrada Amethyst Chunk (9) Vajrada Amethyst Chunk (9) | 0 | 0 | 0 | 3 | 6 | 0 |
 Vajrada Amethyst Gemstone (6) Vajrada Amethyst Gemstone (6) | 0 | 0 | 0 | 0 | 0 | 6 |
 Dragonheir's False Fin (46) Dragonheir's False Fin (46) | 0 | 2 | 4 | 8 | 12 | 20 |
 Sea Ganoderma (168) Sea Ganoderma (168) | 3 | 10 | 20 | 30 | 45 | 60 |
 Old Handguard (18) Old Handguard (18) | 3 | 15 | 0 | 0 | 0 | 0 |
 Kageuchi Handguard (30) Kageuchi Handguard (30) | 0 | 0 | 12 | 18 | 0 | 0 |
 Famed Handguard (36) Famed Handguard (36) | 0 | 0 | 0 | 0 | 12 | 24 |
 Mora (420,000) Mora (420,000) | 20,000 | 40,000 | 60,000 | 80,000 | 100,000 | 120,000 |
YAE MIKO TALENTS / SKILLS
Normal Attack: Summons forth kitsune spirits, initiating a maximum of 3 attacks that deal Electro DMG.
Charged Attack: Consumes a certain amount of Stamina to deal Electro DMG after a short casting time.
Plunging Attack: Gathering the might of Electro, Yae Miko plunges towards the ground from mid-air, damaging all opponents in her path. Deals AoE Electro DMG upon impact with the ground.
Yakan Evocation: Sesshou Sakura (Elemental Skill): Moves swiftly, leaving a Sesshou Sakura behind.
Sesshou Sakura
- Periodically strikes one nearby opponent with lightning, dealing Electro DMG.
- When there are other Sesshou Sakura nearby, their level will increase, boosting the DMG dealt by these lightning strikes.
- This skill has three charges. A maximum of 3 Sesshou Sakura can exist simultaneously. The initial level of each Sesshou Sakura is 1, and the initial highest level each sakura can reach is 3. If a new Sesshou Sakura is created too close to an existing one, the existing one will be destroyed.
DURATION: 14s COOLDOWN: 4s
Great Secret Art: Tenko Kenshin (Elemental Burst): Summons a lightning strike, dealing AoE Electro DMG.
When she uses this skill, Yae Miko will unseal nearby Sesshou Sakura, destroying their outer forms and transforming them into Tenko Thunderbolts that descend from the skies, dealing AoE Electro DMG. Each Sesshou Sakura destroyed in this way will create one Tenko Thunderbolt.
COOLDOWN: 22s ENERGY COST: 90s
YAE MIKO PASSIVE
Meditations of a Yako: When she crafts Character Talent Material she has a set chance to create an extra Talent Material from the same region of a random type. The rarity of this material will be the same materials consumed during crafting.
Unlocked at Ascension 1
Enlightened Blessing: Yae Miko’s Elemental Mastery will increase the DMG dealt by the Sesshou Sakura.
Unlocked at Ascension 4
The Shrine’s Sacred Shade: When Yae Miko uses her Elemental Burst, each Sesshou Sakura destroyed resets the cooldown for one charge of her Elemental Skill.
Unlocked Automatically
YAE MIKO TALENT ASCENSION MATERIALS
Requirements to Max (Crown) 1 Talent
SWIPE TO CONTINUE VIEWING ->
| Material | Lvl 2 | Lvl 3 | Lvl 4 | Lvl 5 | Lvl 6 | Lvl 7 | Lvl 8 | Lvl 9 | Lvl 10 |
|---|---|---|---|---|---|---|---|---|---|
 Teachings of Light (3) Teachings of Light (3) | 3 | 0 | 0 | 0 | 0 | 0 | 0 | 0 | 0 |
 Guide to Light (21) Guide to Light (21) | 0 | 2 | 4 | 6 | 9 | 0 | 0 | 0 | 0 |
 Philosphies of Light (38) Philosphies of Light (38) | 0 | 0 | 0 | 0 | 0 | 4 | 6 | 12 | 16 |
 Old Handguard (6) Old Handguard (6) | 6 | 0 | 0 | 0 | 0 | 0 | 0 | 0 | 0 |
 Kageuchi Handguard (22) Kageuchi Handguard (22) | 0 | 3 | 4 | 6 | 9 | 0 | 0 | 0 | 0 |
 Famed Handguard (31) Famed Handguard (31) | 0 | 0 | 0 | 0 | 0 | 4 | 6 | 9 | 12 |
 The Meaning of Aeons (6) The Meaning of Aeons (6) | 0 | 0 | 0 | 0 | 0 | 1 | 2 | 2 | 2 |
 Crown of Insight (1) Crown of Insight (1) | 0 | 0 | 0 | 0 | 0 | 0 | 0 | 0 | 1 |
 Mora (1,652,500) Mora (1,652,500) | 12,500 | 17,500 | 25,000 | 30,000 | 37,500 | 120,000 | 260,000 | 450,000 | 700,000 |
YAE MIKO ARTIFACTS / WEAPONS
best artifacts for Yae Miko
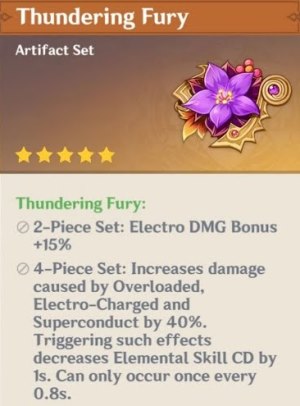
THUNDERING FURY LOCATION

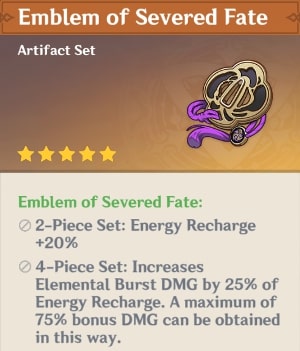
EMBLEM OF SEVERED FATE LOCATION

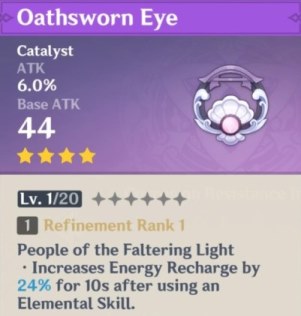
best Weapons for Yae Miko
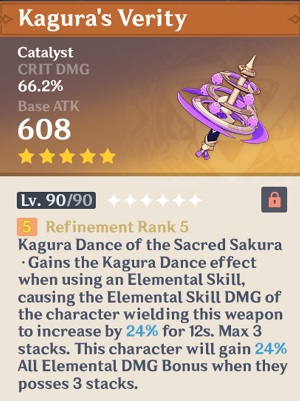
YAE MIKO BUILDS / STRATEGY

HP | ATK | ATK% | ELECTRO% | CD%/CR%
MAIN DPS: Yae Miko needs some pretty good investments to make her a main. She needs CR, CD, ATK, Electro DMG along with elemental mastery and energy recharge.
BUSRT SUPPORT DPS: If you want to mainly use Yae for her E and Burst to do contineous damage, the focus on her Elemental Mastery, Electro Damage, Energy Recharge, followed by the typical damage of ATK, CR, and CD.
These are also general recommendations, you will need to alter your artifacts and stat builds based on what content you want to use this character for and what team you are using him/her with, however, these are consider among the best catalyst for Yae Miko. A general rule for DPS units are CR is roughly 50% of your CD.
YAE MIKO CONSTELLATIONS
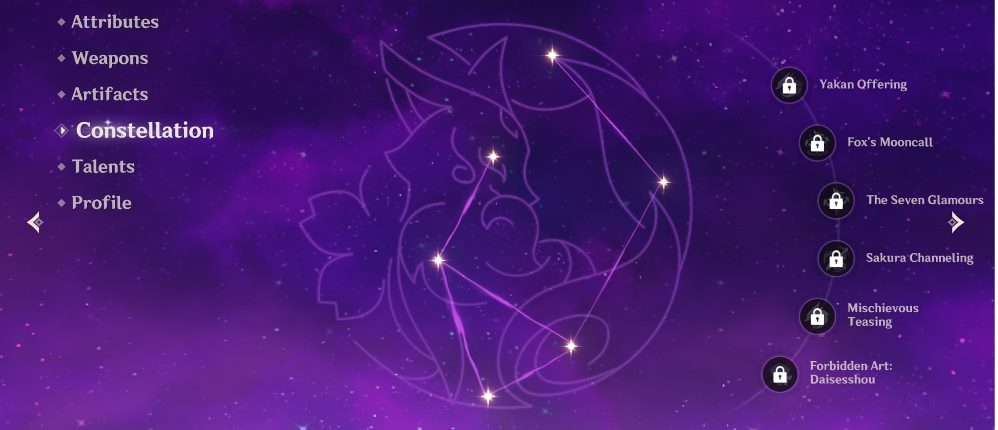
Yakan Offering (Lvl 1): Each time Great Secret Art: Tenko Kenshin activates a Tenko Thunderbolt, Yae Miko will restore 8 Elemental Energy for herself.
Fox’s Mooncall (Lvl 2): Sesshou Sakura start at Level 2 when created, their max level is increased to 4, and their attack range is increased by 60%.
The Seven Glamours (Lvl 3): Increases the Level of Yakan Evocation: Sesshou Sakura by 3.
Maximum upgrade level is 15.
Sakura Channeling (Lvl 4): When Sesshou Sakura lightning hits opponents, the Electro DMG Bonus of all nearby party members is increased by 20% for 5s.
Mischievous Teasing (Lvl 5): Increases the Level of Great Secret Art: Tenko Kenshin by 3.
Maximum upgrade level is 15.
Forbidden Art: Daisesshou (Lvl 6): The Sesshou Sakura’s attacks will ignore 60% of the opponent’s DEF.
STRENGTHS / WEAKNESSES
STRENGTHS:
- Yae Miko is a great continuous damage unit in Genshin Impact!
- Her normal attack applies Electro damage every hit which is great for elemental reactions.
- Her E is impressive as each turrent(3) hits enemies every 3 seconds for a total of 9 hits. Building her E can add up to significant damage over time.
- Her elemental burst does good damage and when used with her E she will reset her E so you can apply them right back up.
- Her 6th Ascension gives her a significant boost in CR.
WEAKNESSES
- She is very stat heavy if you want her as a main.
- Since all her attacks apply Electro, she is weak against Electro enemies, by that she is literally powerless since they are immuned.
- She struggles with energy issues and need a battery to charge her burst.
RANKING
Combat Rating (7/10): She does require a little bit of practice to get her attack rotation and team rotation in order. However, after that she because an electro dps support menace.
Exploration (6/10): She offers assisted damage, lighting the Electro Monuments, and collecting Sakura Blooms.
Spiral Abyss (9/10): Her E and Burst is excellent for hitting multiple enemies for faster clears in this content.
Artifact Farming (9/10): She has a similiar role here as she does in Spiral Abyss.
Normal/Weekly Bosses (9/10): She’s good in 1v1 fights and dish out a lot of big damage to clear the bosses quickly.
